
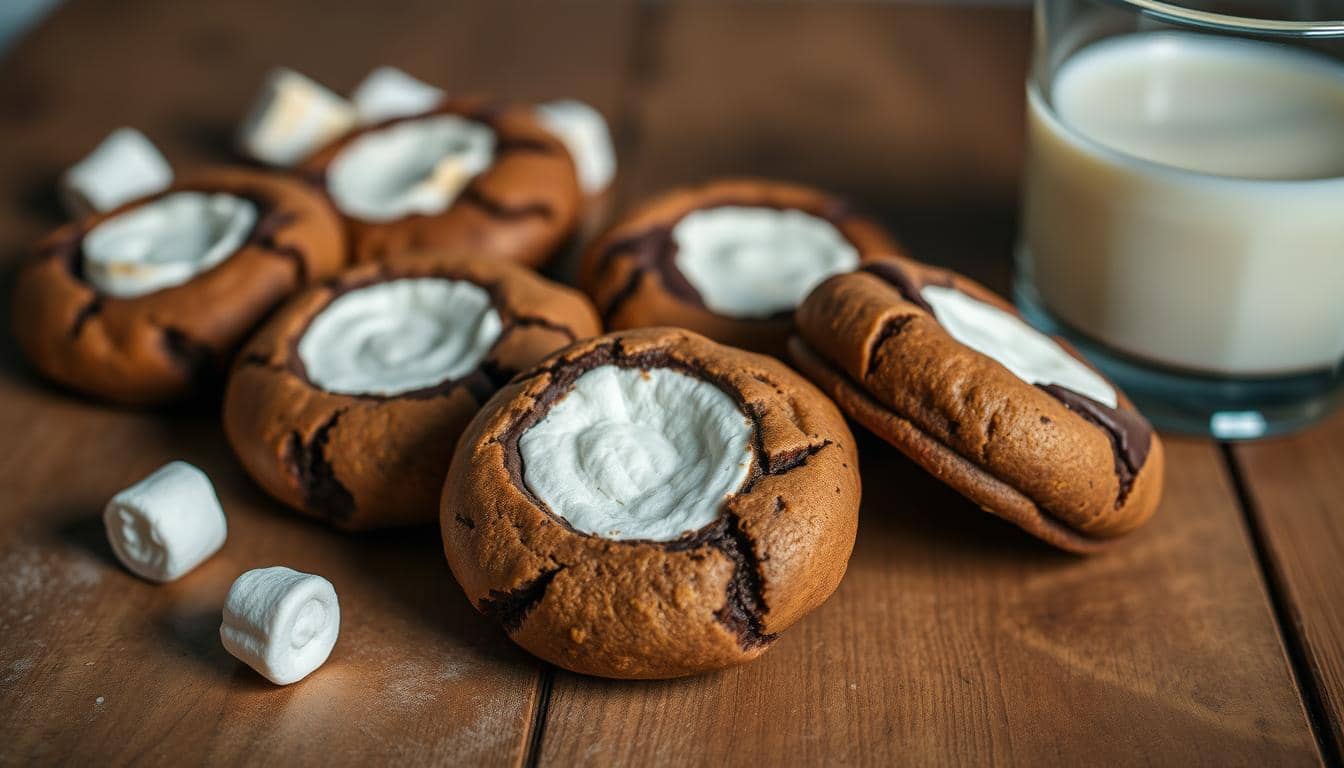
There’s something special about a dessert that brings back childhood memories. This recipe, passed down from my mother, combines soft, chewy goodness with a melt-in-your-mouth topping of marshmallows and chocolate. Every bite feels like a warm hug from the past.
Perfect for family gatherings or cozy nights in, these treats strike the right balance between rich and sweet. The soft base holds up the gooey topping, making each bite a delightful experience. Best of all, they’re surprisingly simple to make.
Whether you’re baking for kids or adults, this recipe delivers crowd-pleasing results every time. Customize them with nuts, sprinkles, or a drizzle of caramel for extra flair. One batch never lasts long!
Key Takeaways
- Soft, chewy base pairs perfectly with melty toppings
- Simple recipe with impressive results
- Great for both kids and adults
- Easy to customize with extra toppings
- Nostalgic family recipe with universal appeal
Why You’ll Love These Chocolate Marshmallow Cookies
Few desserts balance simplicity and indulgence like these crowd-pleasing treats. With a fudgy, brownie-like texture and gooey toppings, they’re a guaranteed hit. Best of all, you’ll love how easy they are to make—no fancy tools or chilling required.

*One bowl, no mixer*—just melt butter, stir, and bake. The melted butter creates chewy centers with delicate crisp edges, while cocoa powder deepens the flavor. Perfect for last-minute baking sessions or holiday gatherings.
Time-Saving Perks
| Feature | Benefit |
|---|---|
| One-bowl prep | Minimal cleanup |
| No chilling | Ready in 30 minutes |
| Melted butter | Rich texture without creaming |
Readers rave about these cookies: *“My family devoured them before they cooled!”* Dress them up with sprinkles or keep them classic—either way, you’ll love the results.
Ingredients You’ll Need
Great baking begins with the right mix of dry and wet ingredients. Each component plays a role in texture and flavor. Here’s what to grab from your pantry.
Dry Ingredients
Start with 2 cups (250g) flour for structure. For deeper flavor, use ⅔ cup cocoa powder. Brands like Hershey’s or Ghirardelli work well.
Pro tip: Weigh flour for accuracy. Cup measurements can vary.
| Ingredient | Purpose |
|---|---|
| Dutch-process cocoa | Richer color, milder taste |
| Natural cocoa | Tangy, reacts with baking soda |
Add 1 tsp baking soda for lift. Ensure it’s fresh—old soda won’t rise properly.
Wet Ingredients
Room-temperature eggs blend better, creating a smooth emulsion. Cold eggs can make dough lumpy.
- Substitutions: Gluten-free flour or vegan butter work too.
- Vanilla extract enhances sweetness without overpowering.
Mix wet and dry ingredients gently. Overmixing leads to tough results.
Essential Tools for Baking
The right tools make baking effortless and results consistent. Whether you’re a beginner or a pro, having reliable equipment ensures your cookie dough turns out perfectly every time.
Silicone mats vs. parchment paper: Both prevent sticking, but silicone offers reuseability, while parchment provides crispier edges. For easy cleanup, parchment wins.
- Cookie scoop (1.5 tbsp): Creates uniform shapes for even baking.
- Kitchen shears: Snip marshmallows cleanly without sticky messes.
- Affordable swaps: Consider a hand mixer if a stand mixer isn’t in your budget.
An oven thermometer is a game-changer. Most home ovens run hot or cold—accuracy ensures your treats bake evenly. *“A $10 thermometer saved my batches from burning!”*
For sheet pans, opt for heavy-gauge aluminum. Thin pans warp, leading to uneven heat distribution. Pair with a light-colored surface to avoid over-browning.
Step-by-Step Baking Guide
Mastering this recipe comes down to precision in each step—let’s break it down. From mixing to finishing touches, follow these techniques for treats that impress.
Preparing the Dough
Start by creaming butter and sugar in a large bowl until light and fluffy. This traps air for a tender texture. Pro tip: Scrape the bowl’s sides to ensure even mixing.
Add eggs one at a time, blending fully after each. Mix dry ingredients separately, then fold them in just until combined. Overmixing toughens the dough.
Shaping and First Bake
Roll dough into 1.5-tbsp balls. Flatten slightly to prevent uneven spreading. Place them 2 inches apart on a lined sheet.
Bake in a preheated oven at 350°F (177°C) for 8 minutes. They’ll look underdone—this ensures chewiness. Rotate the pan halfway for even browning.
Adding Marshmallows and Finishing
Press marshmallows into the warm centers. Return to the oven for 2 minutes until puffed but not browned. Let cool 5 minutes before drizzling with melted chocolate.
- Troubleshooting: If marshmallows leak, reshape dough thicker next time.
- Chocolate tip: Melt at 50% power in 30-second bursts, stirring between.
Pro Tips for Perfect Cookies
Small tweaks make big differences—here’s how to perfect your technique. Whether you’re a beginner or a seasoned baker, these hacks ensure flawless results every time.
Chill your dough for crackly tops. Resting cookie dough for 30 minutes hydrates the flour, creating a chewy interior and crisp surface. For extra texture, roll dough balls taller than wide.
Swirl like a pro: Use cookie cutters as stencils. Press them lightly into baked cookies, then rotate to carve clean edges. A damp spoon smoothes marshmallow peaks without sticking.
- Altitude adjustments: Above 3,000 feet? Reduce baking soda by ⅛ tsp and add 1 tbsp extra flour to prevent spreading.
- Doneness test: Edges should be set, but centers soft. They’ll firm up as they cool on the sheet.
- Non-stick trick: Dust marshmallows with powdered sugar before cutting to avoid gooey scissors.
Preheat your oven 20°F hotter than the recipe suggests, then reduce heat when baking. This jump-starts the rise for taller, bakery-style treats.
Variations to Try
Transform your baking game with creative twists on this classic treat. Whether you crave seasonal flavors or gourmet flair, these ideas will inspire your next batch.
Seasonal Delights: Swap toppings for holiday vibes. Crushed candy canes add a peppermint zing in winter, while pumpkin spice blends cozy warmth into fall batches.
Pro tip: Press seasonal sprinkles into melted *marshmallow* for festive color. For summer, try toasted coconut or citrus zest.
- Gourmet Upgrades: Elevate with flaky sea salt or edible gold leaf. A dusting of *cocoa* powder or espresso granules deepens richness.
- Allergy-Friendly: Use sunflower butter instead of peanut butter. Oat flour and flax eggs add chewiness without gluten.
S’mores Twist: Mix graham cracker crumbs into the dough. Top with extra *chocolate* chunks and torch the *marshmallow* for a campfire vibe.
Adult Pairings: Serve with bourbon-spiked caramel or espresso martinis. The bitter notes balance the sweetness perfectly.
“The sea salt variation disappeared at my dinner party—guys couldn’t resist the sweet-salty combo!”
How to Store and Freeze
Keep your treats fresh and ready to enjoy anytime with these storage tips. Whether you made extra dough or have leftover baked goods, proper preservation locks in that soft texture.
Room temperature vs. fridge: For short-term storage, an airtight container at room temperature maintains ideal chewiness for up to 5 days. Refrigeration dries them out faster but extends shelf life by 2 extra days.
| Storage Method | Texture | Duration |
|---|---|---|
| Countertop (airtight) | Soft center, crisp edge | 5 days |
| Refrigerated | Firmer throughout | 7 days |
Freezing like a pro: For dough balls, layer them between wax paper in freezer bags. Squeeze out excess air to prevent freezer burn. They’ll keep for 3 months—bake straight from frozen, adding 2 extra minutes.
- Thawing baked goods: Transfer to the counter for 1 hour or microwave at 30% power for 15 seconds
- Revival trick: Stale treats regain freshness with a 5-minute oven warm-up at 300°F
- Chocolate care: Avoid temperature swings to prevent white bloom spots
“Frozen dough balls saved my holiday baking—just pull and bake when guests arrive!”
Label containers with dates to track freshness. For best results, freeze within 24 hours of baking. This locks in moisture before staling begins.
Troubleshooting Common Issues
Even experienced bakers encounter hiccups—here’s how to fix them. From flat treats to cracked toppings, these solutions save your batch every time.
Flat cookies? Check your butter temperature. Too soft spreads dough thin. Chill it for 15 minutes if needed. Measure flour correctly—packed cups add density.
Marshmallow meltaways? Press toppings gently after baking. Drizzle melted chocolate to seal cracks. For extra hold, freeze marshmallows 10 minutes before adding.
| Issue | Quick Fix |
|---|---|
| Underbaked centers | Lower oven temp by 25°F; bake 2 extra minutes |
| Overmixed dough | Rest 20 minutes to relax gluten |
| Bitter cocoa | Sift with sugar to balance acidity |
Salvage overmixed dough by folding in 1 tbsp milk. Rest it covered to restore elasticity. For dry results, brush baked goods with simple syrup.
- Oven hot spots: Rotate pans halfway through baking.
- Sticky scissors: Dip in ice water before cutting toppings.
- Burnt edges: Shield with foil strips during the last 3 minutes.
“The butter-temp trick transformed my batches—no more pancake cookies!”
Conclusion
Baking becomes unforgettable when shared with loved ones. These chocolate marshmallow cookies aren’t just treats—they’re memories in the making. Homemade beats store-bought every time, with flavors that spark joy and creativity.
Make this recipe your own. Add nuts, swirls of caramel, or festive sprinkles. Snap a photo and tag #BakeWithLove to inspire others. We’d love to see your twists!
Stay tuned for our holiday cookie series—more easy, crowd-pleasing ideas coming soon. Now, gather your family and bake something sweet together. Happy baking!