
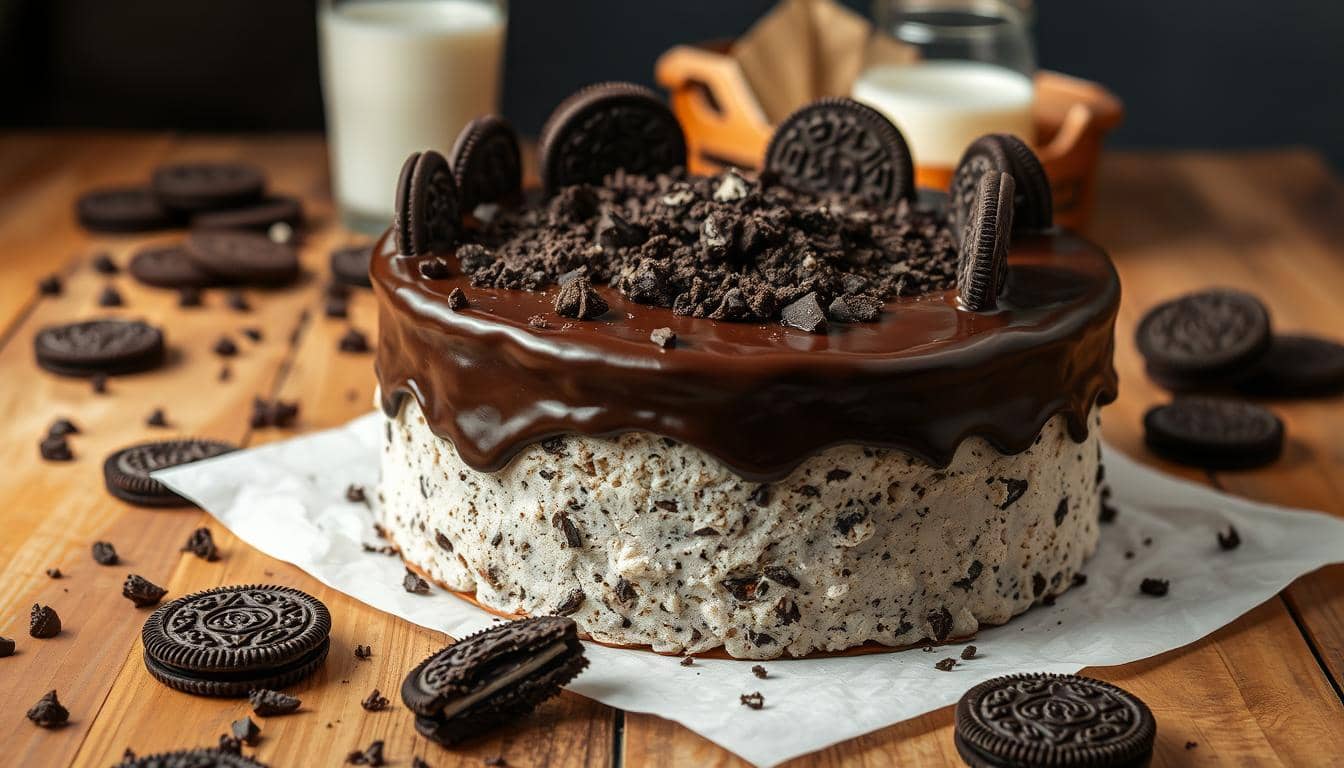
Enjoy a treat that mixes chocolate cake with Oreo crunch. This oreo cake recipe is more than a dessert. It’s a feast for your senses, perfect for any occasion.
It doesn’t matter if you’re a pro or a beginner. This guide makes sure every bite is filled with Oreo flavor. Learn how easy it is to make a cake that everyone will love.
Key Takeaways
- Moist chocolate layers paired with crushed Oreos for a signature crunch.
- Clear instructions for both oven-baked and no-bake oreo cake recipe variations.
- Tips to customize frostings using condensed milk or cream cheese.
- Storage hacks to keep leftovers fresh and flavors intact.
Introduction to Your Irresistible Oreo Cake

Make any dessert table shine with this simple Oreo cake recipe. Each bite is a mix of textures: crunchy cookies, smooth frosting, and creamy filling. It’s perfect for birthdays or just hanging out with friends, and it’s easier than you might think.
Why You’ll Love This Recipe
- No complicated techniques—just mix, bake, and assemble in under an hour
- Flavor combinations that balance rich chocolate and buttery cookie notes
- Adaptable for dietary tweaks like gluten-free adjustments
What Makes This Cake Special
This cake is more than just a treat—it’s an adventure. The magic happens with layers of crushed Oreos and a frosting that’s as real as it gets. You can even add your own twist with caramel swirls or seasonal toppings. It’s a recipe that shows you don’t need to be a pro to make something amazing.
Ingredients Essentials for Your Homemade Oreo Cake
Making a tasty homemade oreo cake starts with picking the right ingredients. Each part, from the cookies to the butter, affects the taste and texture. Let’s explore what makes this recipe special.
Key Ingredients and Their Roles
Quality Oreos are a must. They make the cake’s base. Melted butter and sugar mix to create a creamy, fudgy layer. Eggs and flour keep the cake moist and hold it together. Vanilla extract adds warmth without taking over the Oreo flavor.
- Oreos: Choose original or Double Stuf for classic flavor. Crush finely for even distribution.
- Butter: Unsalted butter enhances richness; coconut oil works as a dairy-free swap.
- Sugar: Granulated sugar balances sweetness; reduce by 2 tablespoons if using brown sugar.
Substitutes & Helpful Tips
Make your homemade oreo cake your own with these swaps: For gluten-free diets, use Enjoy Life brand Oreos. Replace butter with vegan margarine or applesauce for lighter options. Always measure dry ingredients by spooning into cups to avoid packing. Room-temperature ingredients mix more evenly.
Pro tip: Add a splash of espresso powder to deepen chocolate notes without bitterness. Test substitutions in small batches first to ensure texture stays perfect.
Master the Ultimate oreo cake recipe
Take your baking to the next level with this guide to making a delicious oreo cake with condensed milk. Follow each step for a moist cake, perfect texture, and rich chocolate taste.
Step-by-Step Instructions
- Preheat your oven to 350°F (175°C). Grease two 8-inch pans and set aside.
- In a bowl, whisk flour, baking powder, and salt. Set this dry mix aside.
- Using a mixer, cream butter and sugar until light and fluffy. Add eggs one at a time, mixing well after each.
- Slowly incorporate the dry ingredients alternating with milk. Add ½ cup of condensed milk here for extra moisture.
- Fold in crushed Oreos gently to avoid crumbling. Divide batter evenly between pans.
- Bake 25-30 minutes until a toothpick comes out clean. Let cool completely before frosting.
Mixing Techniques for Perfect Texture
Learn these tips to avoid dry layers or lumpy batter:
- Reverse creaming: Mix dry ingredients first, then add wet components gradually for even distribution.
- Use room-temperature ingredients. Cold butter or condensed milk can clump.
- Add Oreos last. Overmixing breaks down gluten, so stir just until incorporated.
Pro tip: Swirl a bit of condensed milk into the frosting for an extra layer of sweetness!
Baking Tips and Tricks for a Moist, Chocolatey Cake
Creating the perfect Oreo cake is all about the details. We’ll share expert tips to prevent dry layers and uneven textures. First, preheat your oven exactly as instructed. For a no bake oreo cake, chilling is just as important as baking.
- Don’t overmix batter: Mix just until ingredients come together. Overmixing can make the cake dense.
- Test doneness: Use a toothpick in the center. It should be clean, but watch for browning edges.
- Rest the pan: Cool baked cakes 10 minutes in the pan before transferring. This prevents crumbling.
“Texture is 90% about patience,” says pastry chef Clara Martinez. “Let ingredients like melted chocolate cool slightly before mixing to avoid curdling.”
For no bake oreo cake, chill layers on a flat surface. Use a silicone mold or parchment paper to prevent sticking. When making frostings with condensed milk, add a pinch of salt to balance sweetness and enhance Oreo’s cocoa flavor.
Pro hack: Sprinkle a thin layer of cocoa powder over the pan before adding batter. This adds flavor and prevents sticking. Always measure ingredients by weight for accuracy, which is key for no bake oreo cake recipes needing precise ratios.
Place oven racks in the center for even heat. If using a water bath for custard-based layers, wrap the pan in aluminum foil first. These steps help keep your cake moist, whether baked or chilled.
Crafting Delectable Frostings and Condensed Milk Drizzles
Once your cake layers are baked, it’s time to get creative. Whether it’s a classic Oreo cake or a cheesecake, the right frosting and drizzle make every bite special. Start by making a buttery frosting and a silky drizzle that will make your dessert irresistible.
How to Make a Rich Frosting
Cream 1 cup softened butter in a mixer until smooth. Then, add 4 cups powdered sugar slowly. Mix in 2–3 tablespoons milk until it’s spreadable. Add ½ cup finely crushed Oreos for a nice crunch. If it tastes too sweet, add a pinch of salt.
| Ingredient | Role |
|---|---|
| Crushed Oreos | Adds texture without overpowering sweetness |
| Powdered sugar | Fluffs the mixture to perfect spreadability |
| Room-temp butter | Ensures smooth mixing and stability |
Incorporating Condensed Milk Flavors
Mix 1 can sweetened condensed milk with ¼ cup melted dark chocolate until glossy. If it’s too thick, warm it gently. Then, drizzle it over chilled frosting for a glossy finish. For an Oreo cheesecake, swirl a small batch into the frosting for layered flavor.
- Use a piping bag for clean lines or a fork for rustic peaks
- Add a dash of sea salt to balance sweetness
- Chill frosting 10 minutes before applying drizzle
Try adding espresso powder or peppermint extract for unique flavors. Remember, practice makes perfect. Don’t be afraid to test small batches first!
Decadent Oreo Dessert Alternatives and Variations
Want to try something new? Check out these Oreo-inspired desserts. The oreo ice cream cake recipe is a refreshing choice for summer. Here are three delicious variations:
- Oreo Cheesecake: A treat with a buttery Oreo crust and a creamy filling with cookie pieces.
- No-Bake Ice Cream Cake: Layers of ice cream sandwiches, crushed Oreos, and fudge in a loaf pan. No oven needed!
- Oreo Cookie Cake: A huge, gooey cookie with Oreo bits for a chewy twist on traditional cake.
| Type | Key Features | Prep Style |
|---|---|---|
| Oreo Cheesecake | Cream cheese base with crunchy crust | Baked or no-bake |
| Oreo Ice Cream Cake | Cold layers of ice cream and toppings | No-bake frozen layers |
| Oreo Cookie Cake | Thick, cookie-like texture | Baked |
Make your oreo ice cream cake recipe unique by using mint chocolate chip ice cream or adding peanut butter swirls. These desserts are perfect for gifts or parties. Share your creations and tag us—we’d love to see them!
Decorating Your Cake: Personalize with Oreo Touches
Turn your oreo dessert recipes into a feast for the eyes with creative decorating. We’ll look at ways to add flair for any celebration. Think about textures and colors to mix elegance with fun.
Creative Oreo Garnishes
Small changes can make a big difference. Here are some pro tips:
- Crushed Oreos: Sprinkle over frosting for a crunchy finish.
- Cookie Halves: Arrange around the edges like a chocolate border.
- Chocolate Shavings: Use a vegetable peeler on a chocolate bar for dramatic curls.
The Art of Cake Presentation
Perfect presentation is all about balance. Here’s how to take your design to the next level:
| Technique | Effect |
|---|---|
| Frosting swirls | Adds texture contrast |
| Color accents | Brightens up the classic black-and-white theme |
| Edible glitter | Creates a festive sparkle |
Want to match your garnishes with the season? Try Halloween candy corn or holiday sprinkles for a festive oreo dessert recipes. The aim is to make every bite as stunning as it is tasty.
Simple Steps for No Bake Oreo Cake Delight
Need a quick dessert fix? A no-bake Oreo cake is your go-to. It’s ready in minutes, with no oven needed. It’s perfect for sudden gatherings or a cozy evening at home, keeping all the taste with less prep time.
Why Try a No Bake Version?
Here’s why this option stands out:
- No waiting for the oven—assemble in 15 minutes or less.
- Moist, fudgy texture from chilled creme-filled Oreos and creamy binders like Cool Whip or peanut butter.
- Perfect for warm weather—store in the fridge until ready to serve.
Quick Assembly Tips
Follow these steps for flawless results:
- Mix crushed Oreos with melted butter and condensed milk for a sturdy base layer.
- Layer with chilled frosting and refrigerate between steps to lock in shape.
- Top with melted chocolate drizzle or crushed Oreos for a final crunch.
Store leftovers in an airtight container. This treat stays fresh up to 3 days in the fridge. It’s perfect for those who love Oreo cake but don’t want to bake!
Exploring Oreo Cheesecake and Ice Cream Cake Ideas
Ready to take your Oreo creations further? Dive into creamy cheesecakes or frozen ice cream cakes with these simple adaptations. These desserts use familiar Oreo elements in new ways, perfect for any occasion.
Oreo Cheesecake Recipe Insights
Start with a graham cracker crust mixed with crushed Oreos. Use Philadelphia Cream Cheese for a rich base. For a lighter texture, blend in Cool Whip. Try these tips:
- Use room-temperature cream cheese to mix smoothly.
- Add espresso powder to enhance chocolate flavor subtly.
- Top with melted chocolate drizzle for contrast.
Oreo Ice Cream Cake Essentials
Ice cream cakes require patience but deliver refreshing results. Build layers with premium vanilla or chocolate ice cream, like Ben & Jerry’s or Haagen-Dazs. Follow these steps:
- Line a pan with parchment paper for easy removal.
- Alternate ice cream layers with crushed Oreos and fudge sauce.
- Freeze for 6+ hours; let sit 10 minutes before slicing.
| Aspect | Cheesecake | Ice Cream Cake |
|---|---|---|
| Main Base | Cream cheese mixture | Ice cream |
| Baking? | Yes (325°F for 50 mins) | No baking required |
| Texture | Dense and creamy | Crispy and frozen |
| Storage | Refrigerate up to 3 days | Freeze until ready to serve |
Experiment with mix-ins like peanut butter cups or caramel swirls. Both styles let you customize toppings—sprinkles, whipped cream, or Oreo crumbs add final flair. Keep these tips handy for your next dessert adventure!
Pairing Beverages and Sides for a Complete Dessert Experience
Make your dessert experience better by adding drinks and sides that match its flavors. Coffee fans will love milky drinks like lattes or mochas from Starbucks. These drinks balance the cake’s crunchiness.
For a lighter choice, try iced Americano or green tea. Red wine, like Cabernet Sauvignon, adds a grown-up touch to the sweetness.
“A splash of citrus brightens rich desserts,” says pastry chef Maria Lopez. “Orange juice’s tang cuts through heavy flavors.”
Here are some sides to enhance flavor:
- Fresh berries (strawberries, raspberries) for tart contrast
- Vanilla ice cream from brands like Breyers for cool creaminess
- Whipped cream topped with a drizzle of Nestlé Toll House salted caramel sauce
- Berry compote for a fruity brightness boost
Try serving with spiced chai tea for warmth or vanilla bean ice cream for classic creaminess. Chocolate-dipped strawberries add a nice touch. Remember, keep portions small to let each flavor stand out.
Storing leftovers? Keep cake sealed at room temperature up to 3 days. Serve drinks like wine or coffee at the right temperature. These pairings make your treat unforgettable and complete.
Homemade Decoration Tips for a Stunning Oreo Creation
Turn your Oreo cake into a masterpiece with these smart ideas. Even simple items can make your dessert look like it was made by a pro. Here’s how to get started:
DIY Cake Decoration Ideas
Use what you already have to get creative:
- Make a cookie crust by pressing crushed Oreos along the cake’s edges.
- Stack Oreo halves around the top to form a circular border.
- Use a spoon to create peaks and valleys in the frosting for a textured finish.
Budget-Friendly Styling Tips
Save money with these clever swaps:
- Repurpose a plastic bag as a frosting dispenser by filling it and snipping the tip.
- Add color with lemon zest or cinnamon sprinkles from your pantry.
- Drizzle with caramel sauce using a spoon for a glossy, restaurant-style effect.
“A few strategically placed Oreos and a chocolate ribbon can elevate any cake without extra spending.” – Kitchen Craft Blog
Troubleshooting Common Baking Challenges
Even the best bakers face problems. Don’t let these issues stop you. Here’s how to fix common Oreo cake problems.
Addressing Overmixing and Texture Issues
Overmixing can ruin your cake’s texture. If batter looks tough or dry:
- Stop mixing once ingredients just combine. Overmixing creates gluten, making the cake dense.
- Use a rubber spatula to gently fold in last ingredients. Pause mixing to let batter rest 5-10 minutes.
- If batter is too thick, add a splash of milk. Too runny? Stir in a tbsp flour.
Adjusting Baking Time
Ovens vary—here’s how to adapt:
- Check cakes 5-10 minutes before the recipe’s end time. Insert a toothpick; if it comes out clean, it’s done.
- For darker pans, lower heat by 25°F to prevent burning.
- Small cracks on top? Reduce bake time by 2-3 minutes next time.
Every oven is unique. Keep an eye on your cake and adjust as you go. Pro tip: Invest in an oven thermometer for accuracy.
Serving Suggestions and Storage for Your Oreo Masterpiece
To keep every slice of your Oreo cake as tasty as the first, plan smart. Follow these tips for freshness and presentation.
Perfect Serving Sizes
Cut slices to show off the cake’s layers without too much flavor:
- Serve 1.5-inch thick slices for the right mix of texture and taste.
- Offer mini portions at parties for everyone to try.
- Use small dessert plates to make it look good.
Best Storage Practices to Maintain Freshness
Keep your cake fresh for days with these steps:
- Wrap it loosely in parchment paper after it cools.
- Store in an airtight container at room temperature for up to 2 days.
- Refrigerate for longer storage (3-4 days) to keep moisture in.
| Storage Method | Timeframe | Best For |
|---|---|---|
| Room Temp | 1-2 days | Same-day parties or casual gatherings |
| Refrigerator | 3-4 days | Extended storage without freezing |
| Freezer | 2-3 months | Long-term preservation (wrap in foil first) |
Pro tip: Thaw frozen cakes at room temperature for 2 hours before serving to restore texture.
Conclusion
Now that you’ve mixed the batter and perfected the frosting, your Oreo cake is ready. This recipe combines classic chocolate and cookie layers with creamy frostings. It’s a showstopper for any occasion.
Whether you choose the baked version or the no-bake option, the key is balancing texture and flavor. This creates a moist, chocolatey masterpiece. Remember, avoid overmixing, adjust baking times, and use creative toppings like crushed Oreos or caramel drizzle.
These details ensure your final product looks as good as it tastes. Try adding cheesecake layers or ice cream for a twist. Store leftovers properly to keep them fresh. Pair your cake with milk or coffee for the full dessert experience.
Share photos of your creation online using #OreoCakeMaster to inspire others. With this guide, you’re ready to master Oreo desserts. Happy baking—your next kitchen adventure awaits!